Don’t Toss It, Plant It! 12 Vegetables You Can Regrow From Scraps
Kitchen scrap gardening saves you money on grocery bills and reduces waste. Regrow your kitchen waste into edible veggies and greens!
Did you know you can grow your own food from kitchen scraps that usually end up in the compost?
What Is Kitchen Scrap Gardening?
Kitchen scrap gardening is the ultimate in recycling. It’s environmentally friendly, can save on grocery bills, and it’s a fun, hands-on science lesson for young children.
Here are some of the best scraps to get growing. You’ll probably get better results if you start with high-quality organic produce since some non-organic produce is actually treated to prevent sprouting. Also, keep in mind the climate you live in will determine if and when plants started from scraps can be transferred to an outdoor garden.
A Few Things To Keep In Mind
Not everything will sprout. Check on your plants and if after a week you don’t see anything is happening, compost the scraps and try again.
12 Vegetables You Can Regrow From Scraps
1. Green Onions
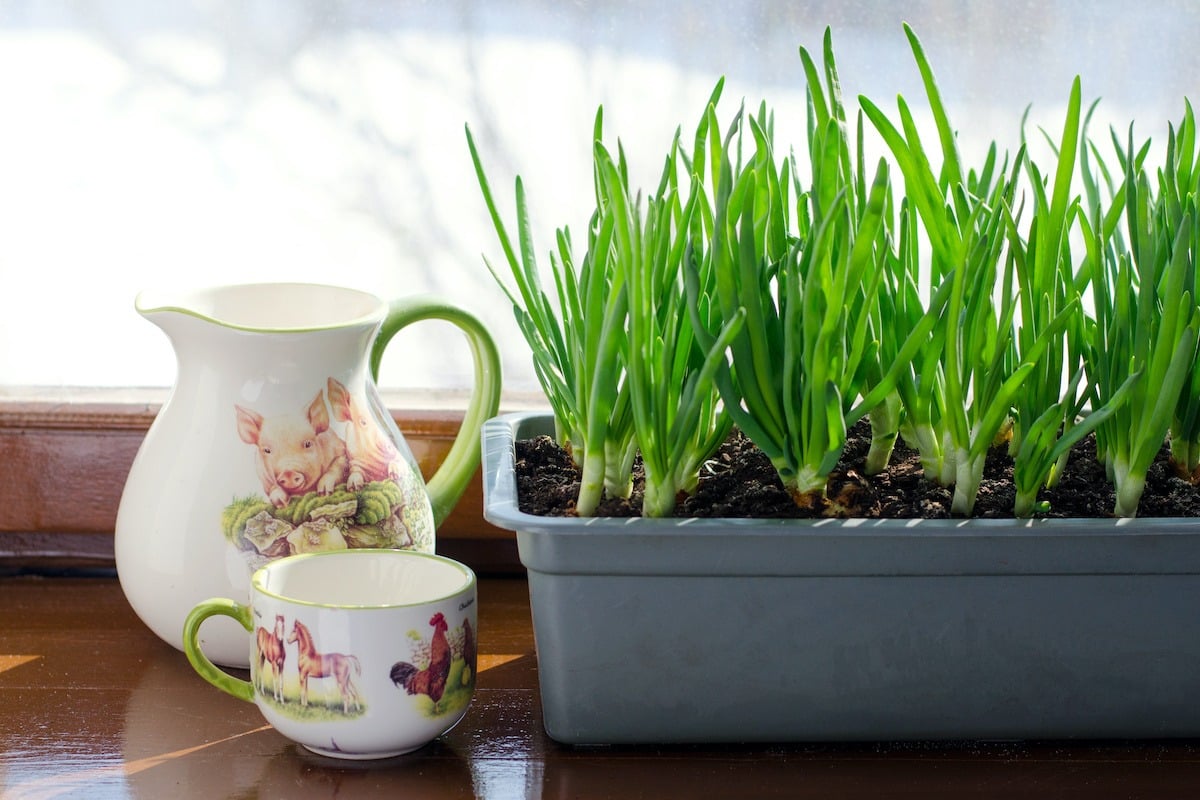
If you cut off and toss the end of the onion with the little roots growing out of it, try growing a new onion with it instead. Plant it root end down in some quality potting soil, place it in a sunny window, keep it watered and watch it grow. This is a great first kitchen scrap gardening project because the green part of the onion will grow back quickly. In less than two weeks it will be tall enough to snip the top off to eat. Then you can plant and keep enjoying them!
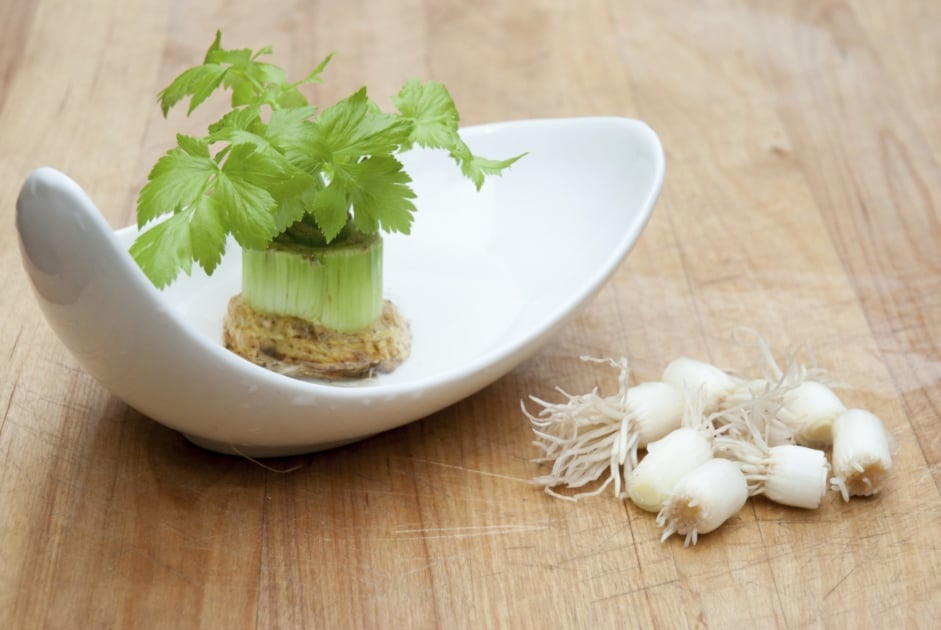
2. Celery

Cut stalks off about two inches from the bottom of the celery bunch and place that white base in a shallow bowl of water. Do not submerge. After several days roots will begin growing from the base and leaves will grow from the top. After about a week, you can plant in soil with only the leaves above the surface. The plant will continue to grow until you’ve got a new head of celery to harvest. Keep in mind that celery is a cool weather crop, so plant outside in early spring rather than waiting until the hot summer months.
3. Romaine Lettuce
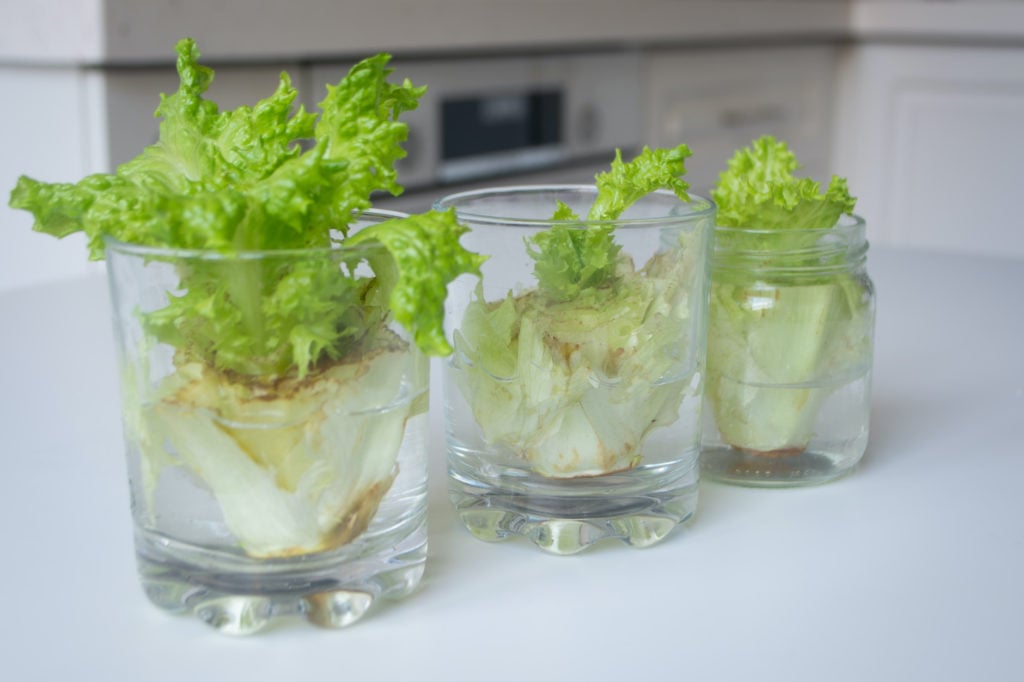
Growing romaine lettuce from scraps is similar to growing green onions and celery. Cut off the lettuce you plan to eat and leave a couple of inches at the base. Place this romaine heart in water and new leaves will start to grow from the center. Remove outer leaves as they start to die. You can eventually plant your romaine in soil when the time is right.
4. Garlic
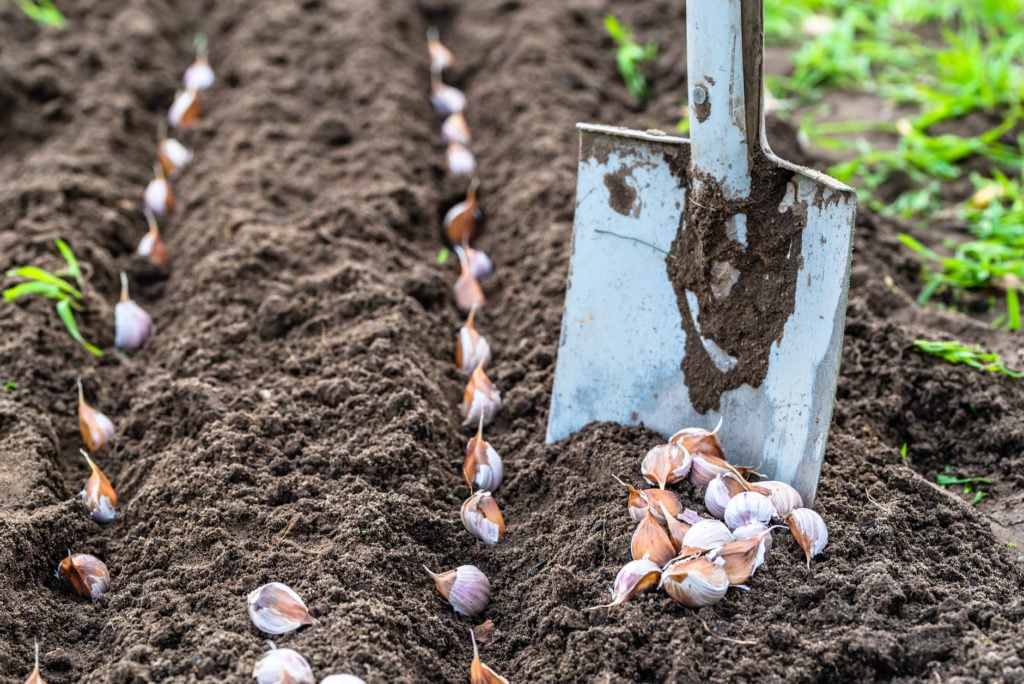
A garlic bulb is made up of individual garlic cloves. Hold one clove back from that pesto you’re making and plant it in your garden in the fall; root side down of course, and the tapered end of the clove pointing up. The next spring or summer you can harvest a full bulb of garlic. It’s ready when the tops begin to turn yellow and fall over. You can also plant garlic cloves in pots indoors near a sunny window and have a constant supply of fresh garlic bulbs.
5. Ginger
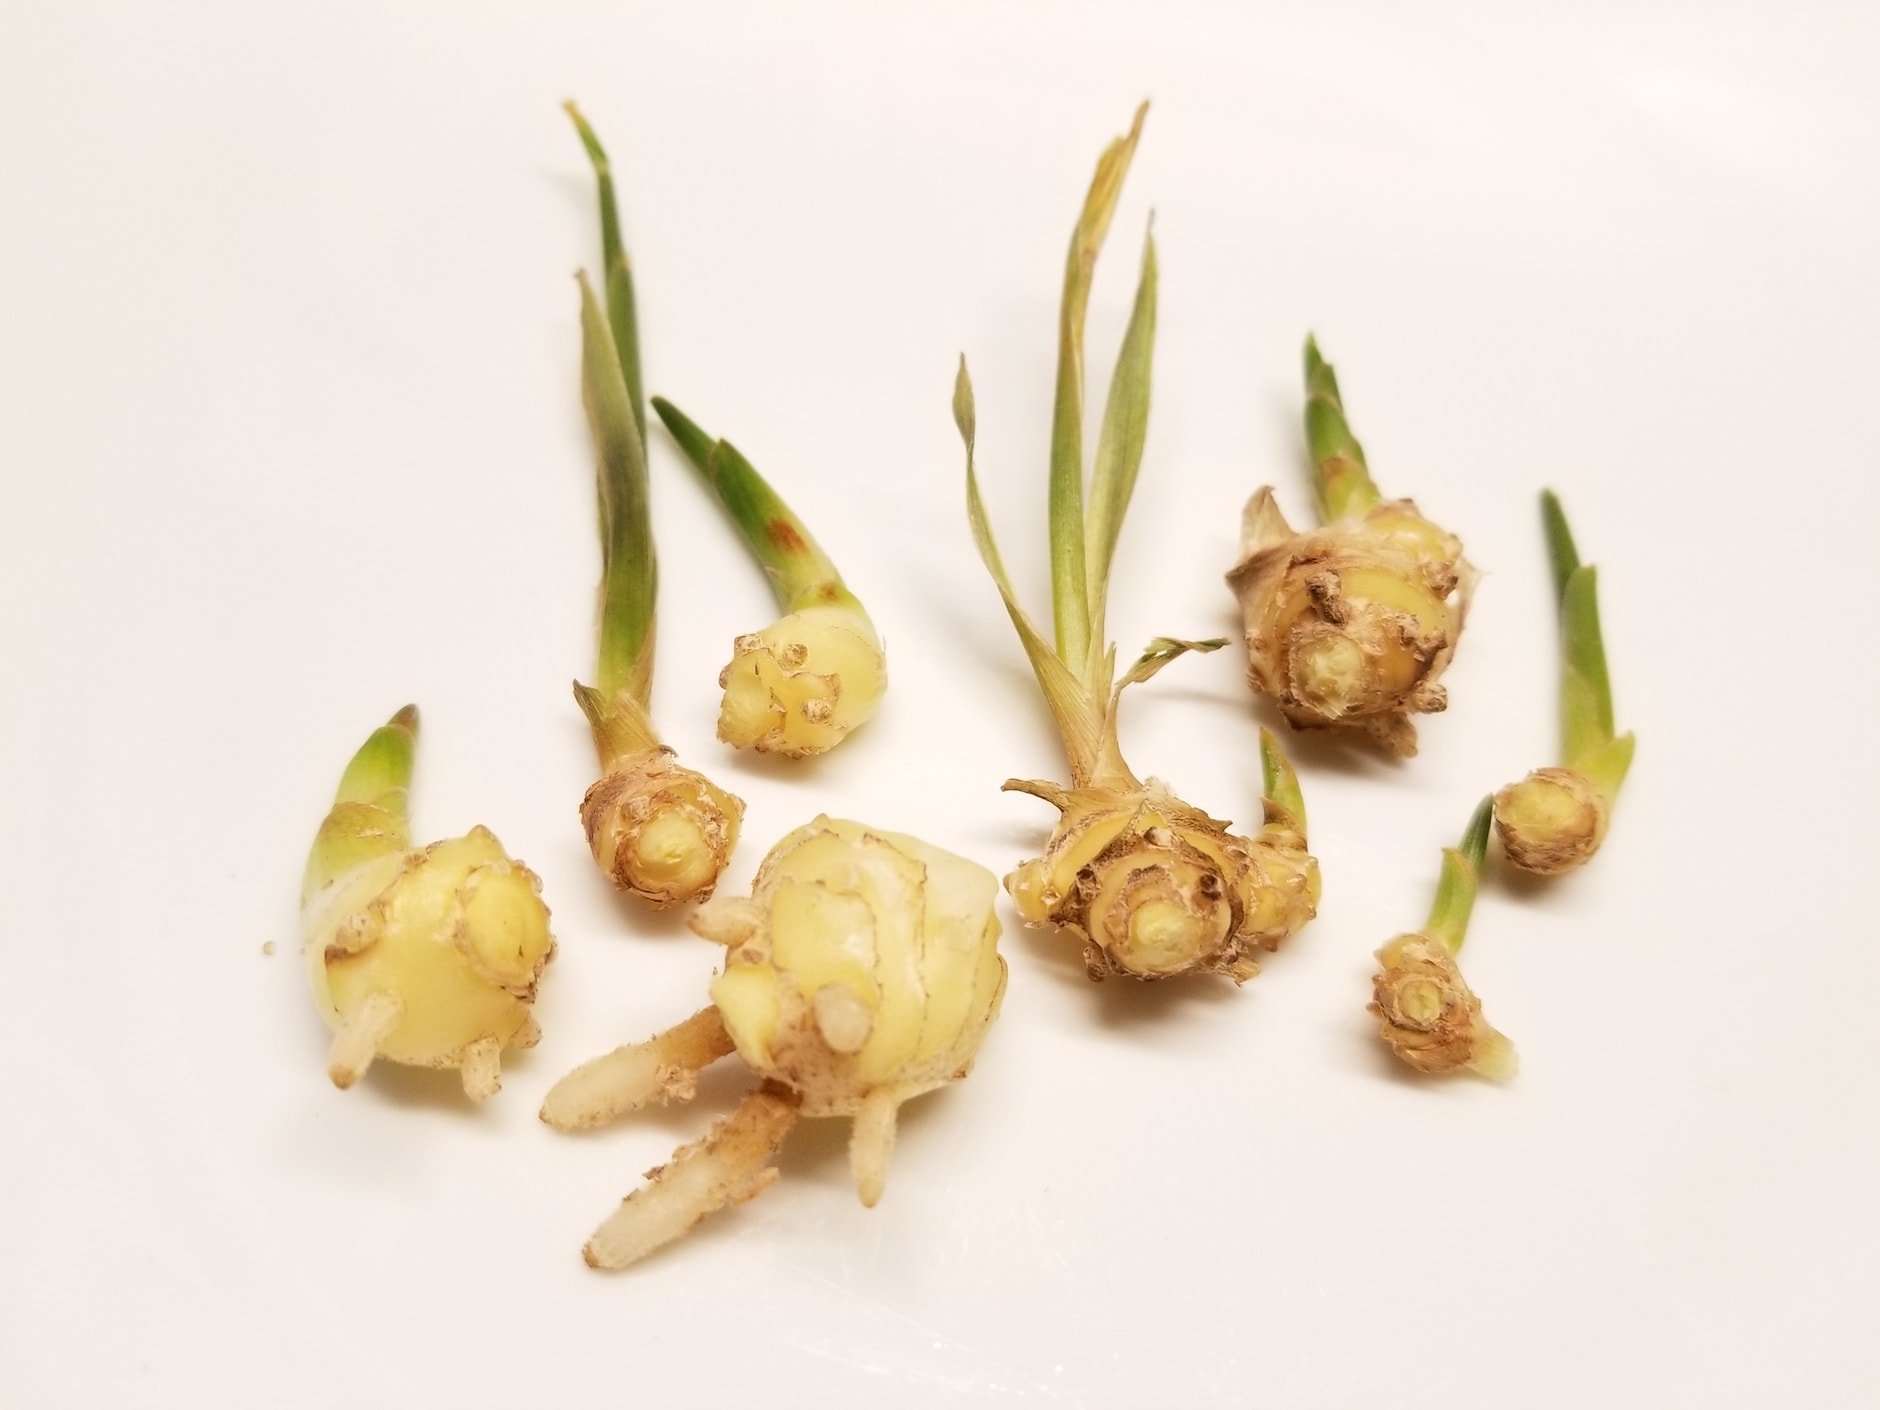
If you’ve got more ginger root than a recipe calls for, you can freeze it to use later, or you can plant it to grow more ginger root. Put the root in moist potting soil with the newest buds facing up. Ginger is a tropical plant, so you’ll probably want to keep this one indoors. Green shoots will come up out of the soil and the roots will spread out. After a few months, you can harvest pieces of the root, covering it up with soil again when you’ve taken what you need so that it can continue growing.
6. Potato
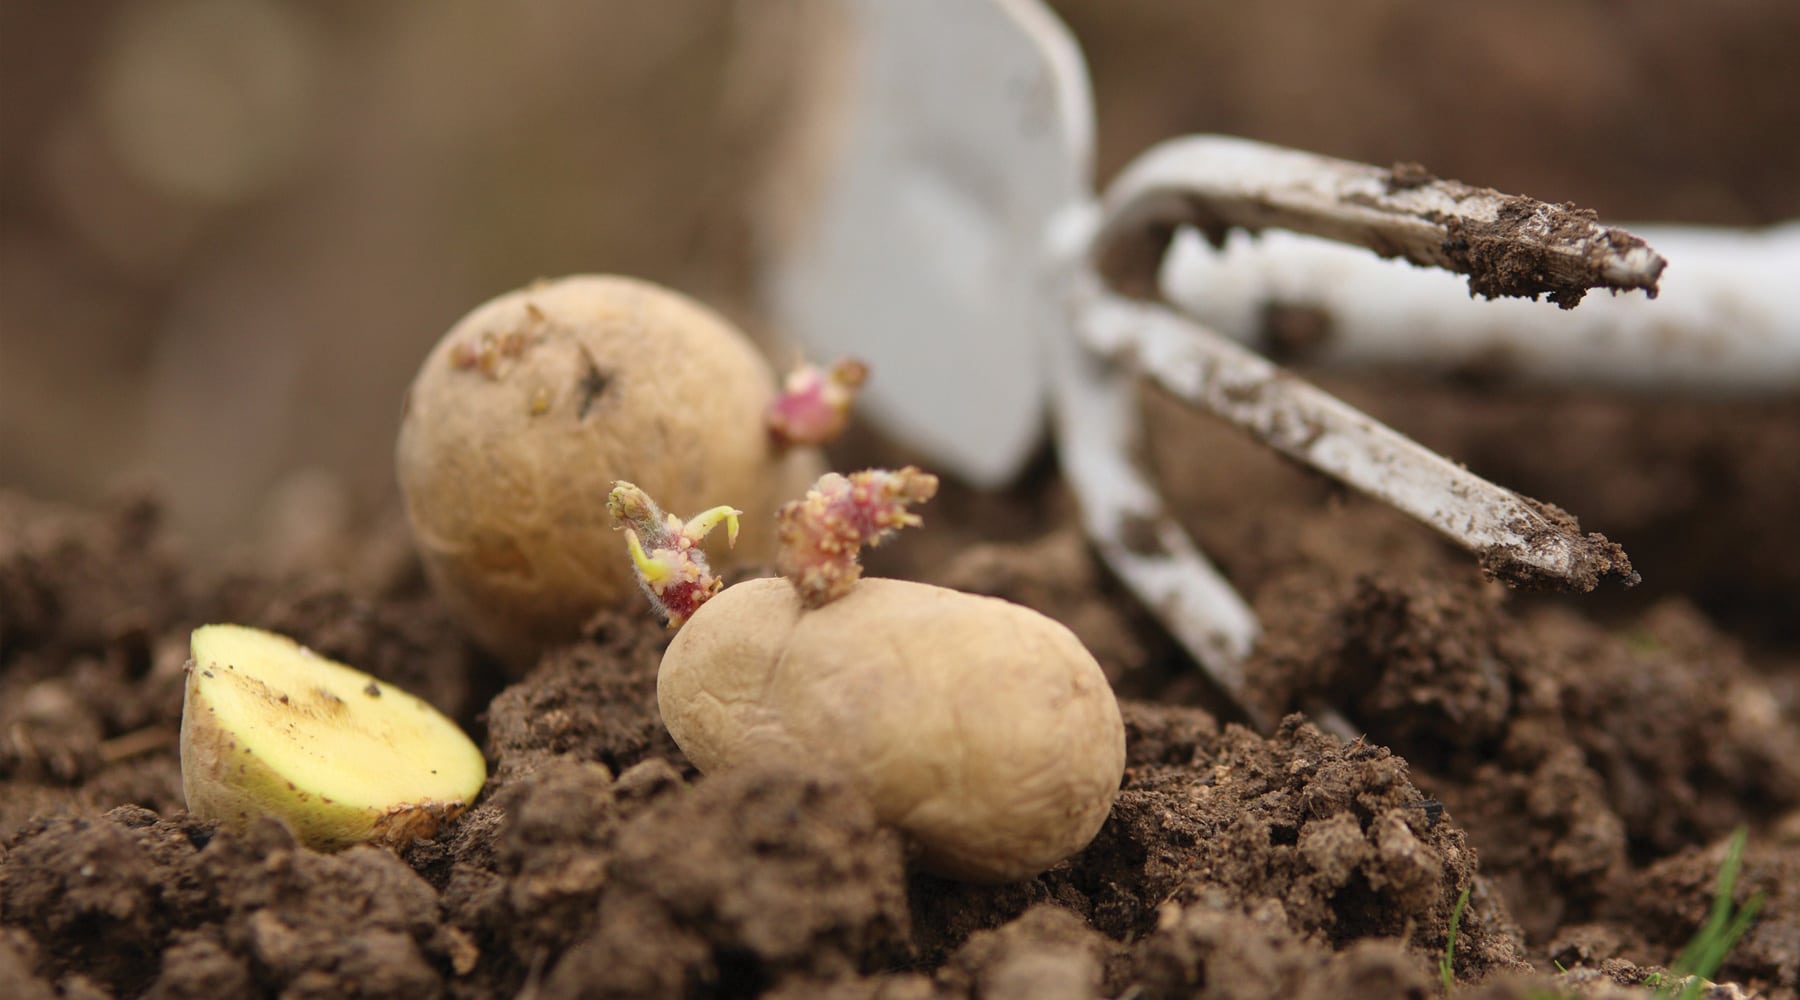
Small potatoes can be planted whole. For large potatoes like bakers, cut into pieces making sure there are a couple of eyes on each piece. Allowing the pieces to dry out for a day or two may help prevent rotting. Plant the pieces in your garden or a container filled with well-drained potting mix and wait for them to sprout. In a few months, you should be able to dig up a whole bunch of new potatoes! Learn more about growing potatoes here.
7. Sweet Potato
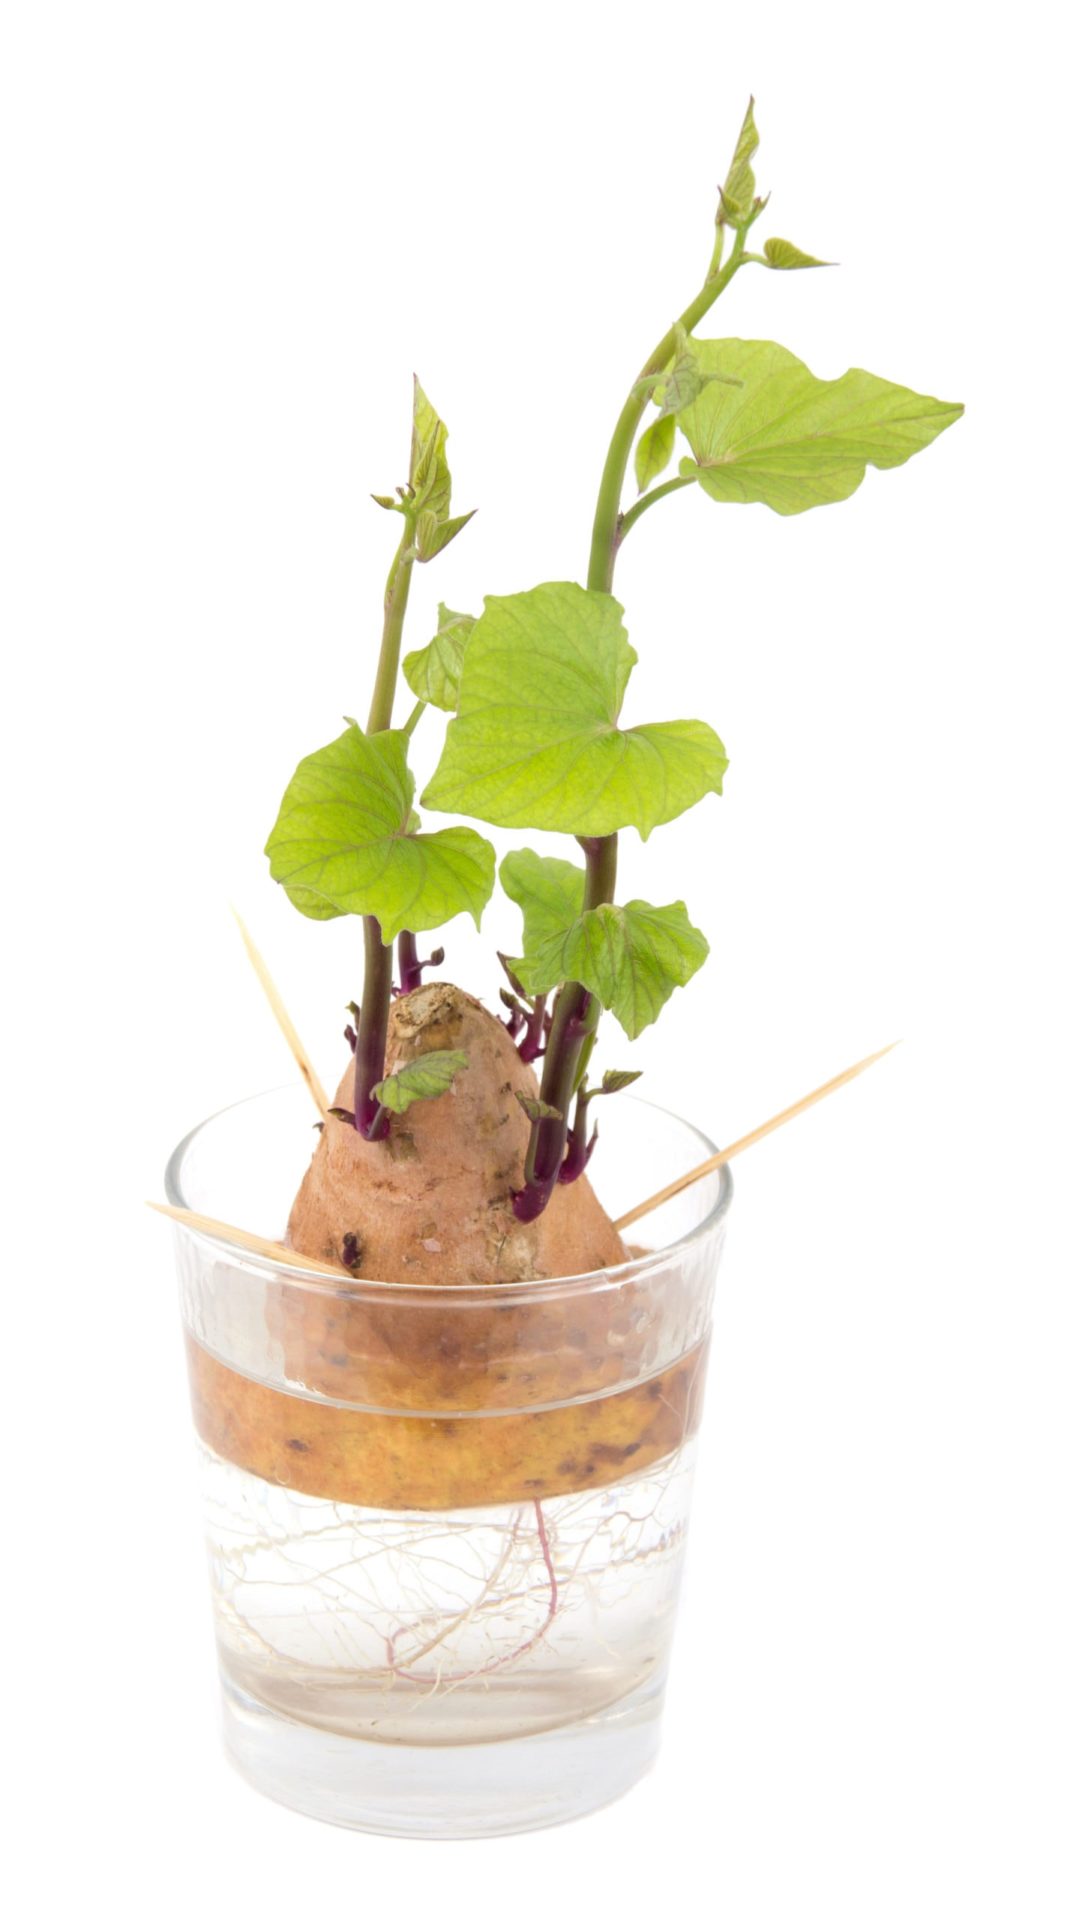
Even easier to grow than potatoes, with sweet potatoes you don’t have to look for any eyes. The easiest method is to plant the entire sweet potato. To produce more than one plant, however, cut a sweet potato in half and suspend it using toothpicks in a shallow container of water. Roots and sprouts will begin to grow in a few days. Once the sprouts are about four inches or so in length, just twist them off and place them in a container of water. When the roots from this container reach about an inch in length, you can plant them in soil in a garden or large container.
8. Basil, Cilantro, and Other Herbs
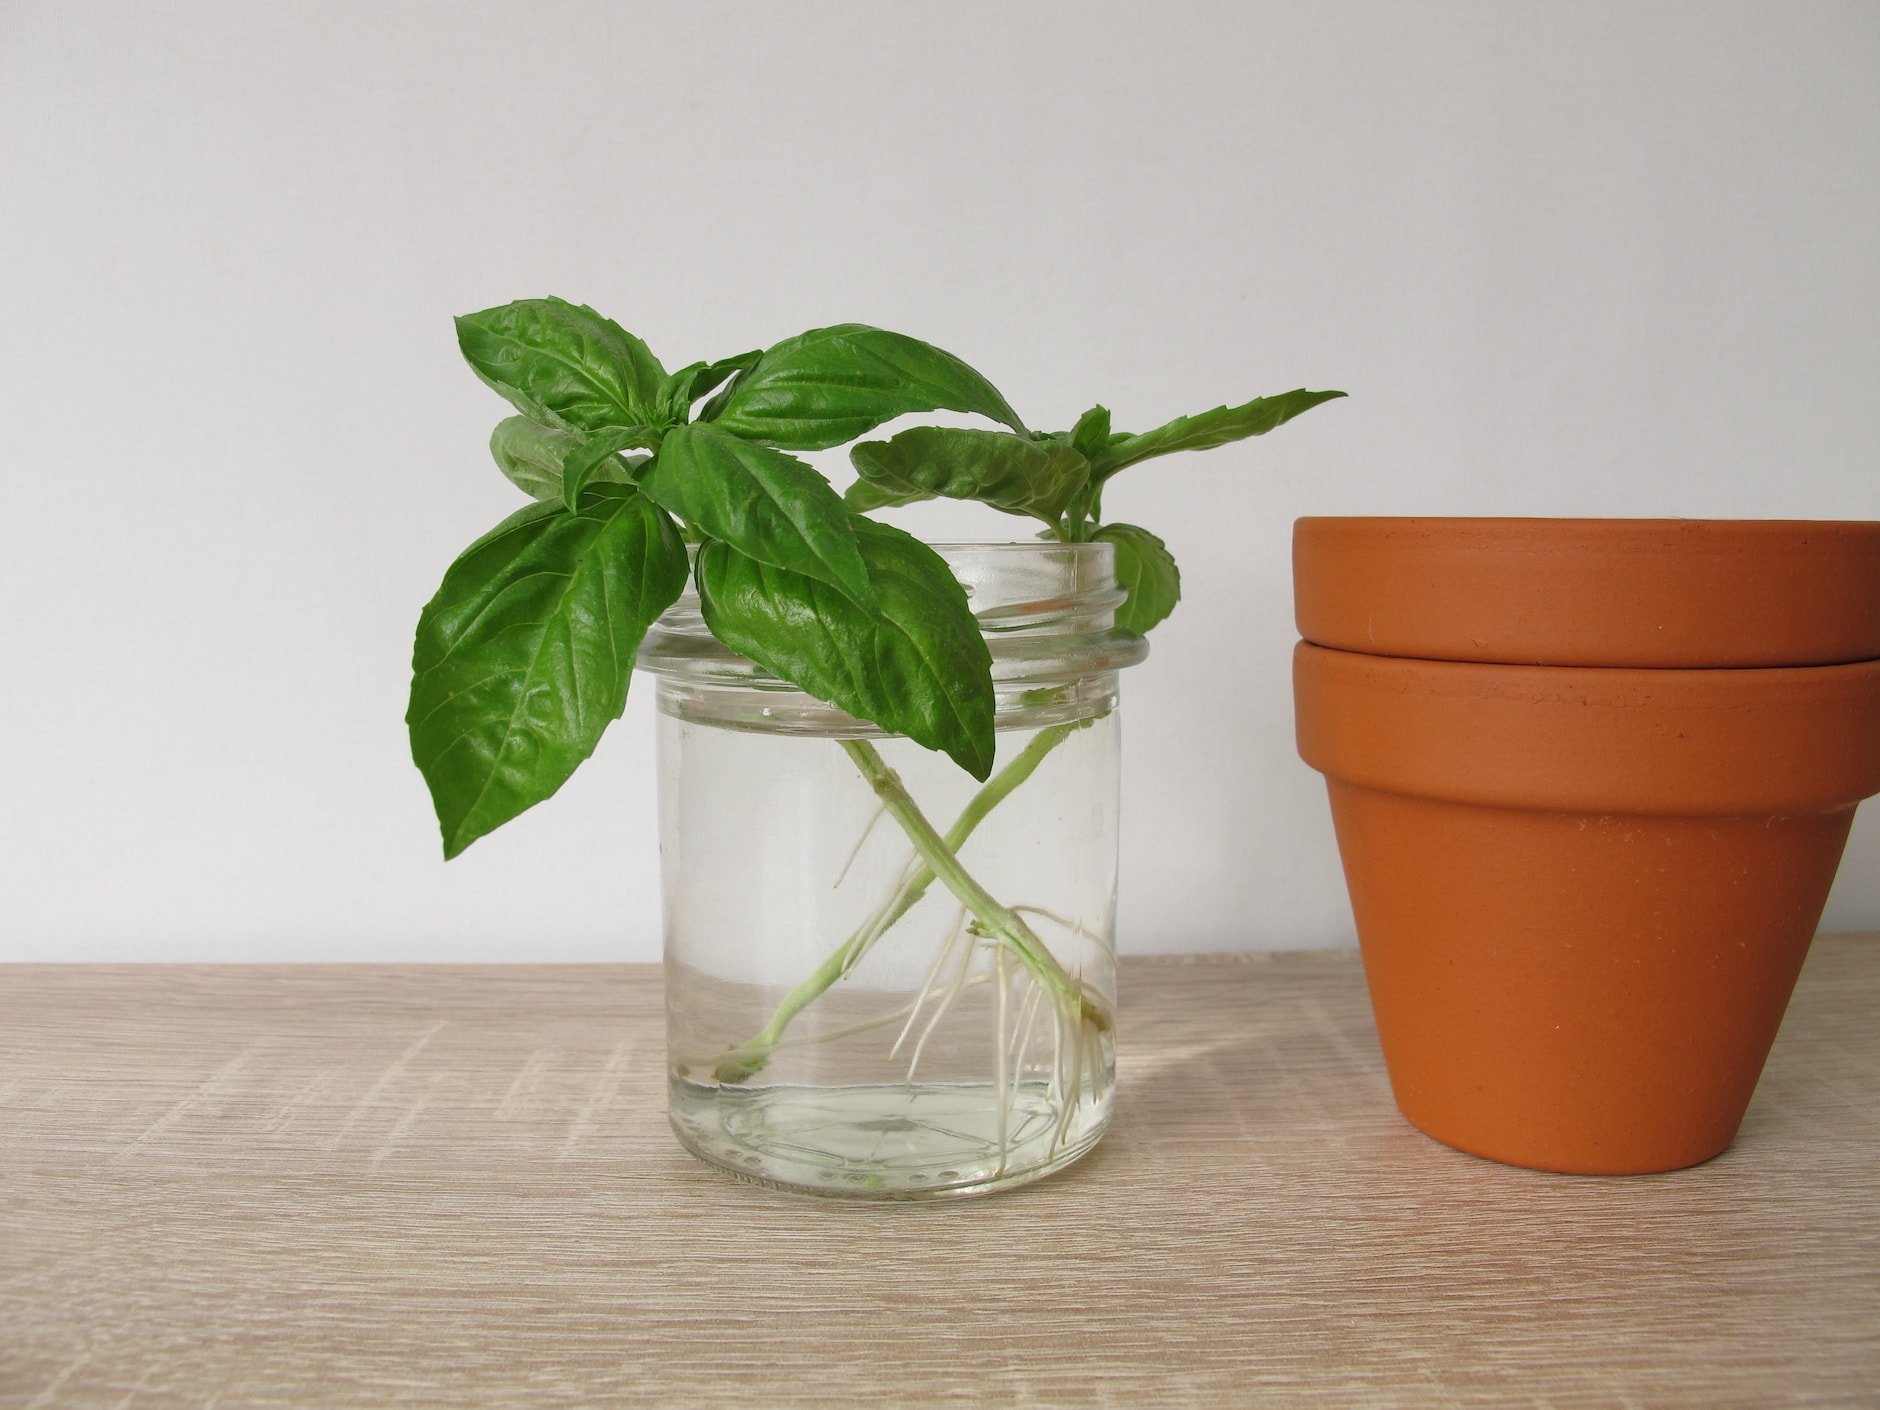
Re-growing herbs, such as basil and cilantro, is fairly easy to do. Cut a stem about four inches long, and place it into a glass of water. Be sure that the leaves are not submerged in the water. Place your stem in a bright area, but out of direct sunlight. In a few days, look for roots forming. Once these roots are about an inch long, go ahead and transplant them into some soil. In no time you will have your very own flourishing herb garden.
9. Mushrooms
Re-growing mushrooms from scraps, while more challenging, is still possible. Mushrooms thrive in a warm room with plenty of humidity. Planting in a pot, rather than in the ground, will allow you to control your planting environment better. First cut off the cap of a mushroom and stick the stem into nutrient-rich soil leaving the top exposed. Keep an eye out for a new growth. Harvest when fully grown.
10. Carrots, Beets, and Other Root Crops
For these veggies, you aren’t actually re-growing the root themselves, but rather the leafy tops. Beet and carrot greens house an enormous amount of the plant’s nutrients and carry a notably wide range of uses. Tossing them into a salad, sauté, or smoothie is a great way to get a nutrient boost. To regrow root vegetable greens, salvage the tops (the part of the vegetable where the leaves come out, about 1″ of the vegetable still intact) and place in a shallow tray of water (but don’t submerge). Within a few days, you should notice new green tops growing. You can harvest the greens when ready, or once the roots have begun to grow, simply transplant them into the ground and harvest the greens as needed. This method will work with beets, turnips, carrots, and parsnips.
11. Onions
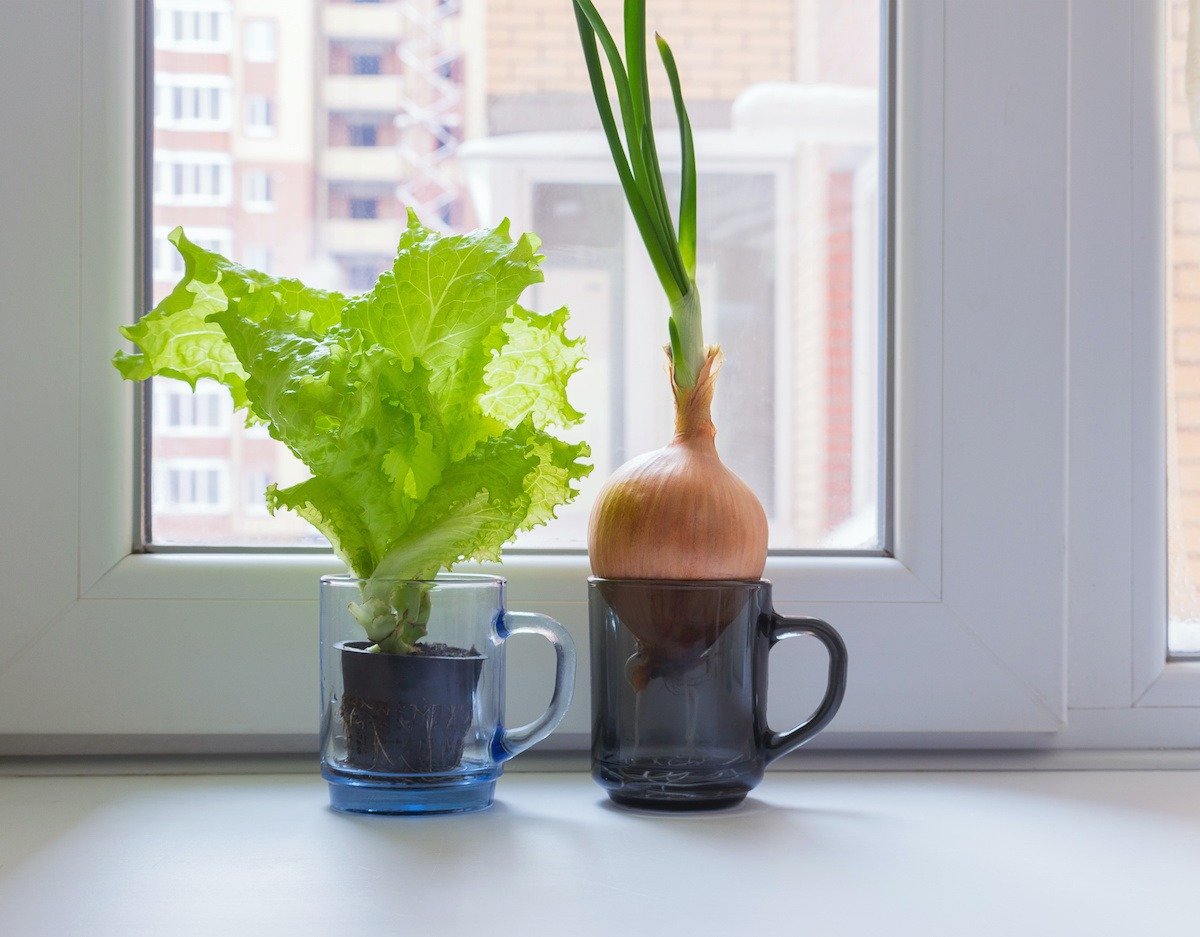
Another simple one to regrow from scraps are bulbs, such as yellow or red onions. Simply cut a one-inch piece off the root end of the onion and set it on the ground or in a bowl of shallow water with the cut surface above the water. It will soon begin to regenerate its roots which can then be planted in soil. You can even set an entire onion in water and watch it sprout! Then it can be planted outside in the garden.
12. Pineapple!
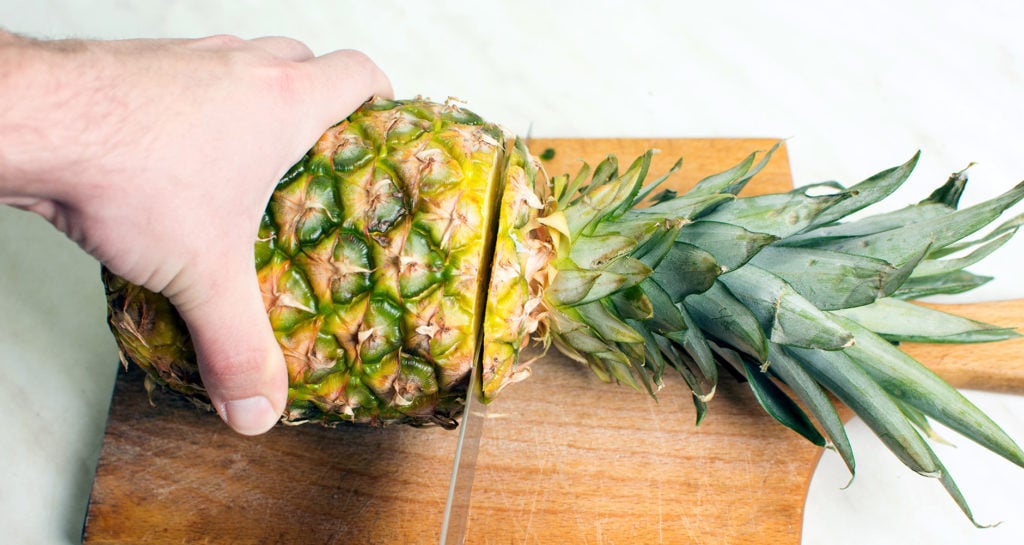
While it’s not a vegetable, it’s still pretty cool to be able to grow your own pineapple at home! See how it’s done, here.
Regrow Vegetables From Seeds
Don’t stop with just scraps! You can also retrieve your own seeds from your food scraps in order to propagate. Rinse off the slimy, seedy insides of your organic tomatoes and allow them to dry thoroughly. Plant them in a container inside until sprouted to a few inches tall, when they can then be transplanted outside. Peppers, cucumbers, pumpkins, winter squash, and microgreens can all also be re-grown by salvaging their seeds. Turn those composting scraps into new, edible treasures.
Content developed by freelance writers Judy Kneiszel and Natalie LaVolpe.

This article was published by the staff at Farmers' Almanac. Do you have a question or an idea for an article? Contact us!
- Farmers' Almanac Staffhttps://www.farmersalmanac.com/author/fa-admin

- Farmers' Almanac Staffhttps://www.farmersalmanac.com/author/fa-admin
- Farmers' Almanac Staffhttps://www.farmersalmanac.com/author/fa-admin
- Farmers' Almanac Staffhttps://www.farmersalmanac.com/author/fa-admin


Veg from veg. Great article. Plenty more, though.
Are there any books that are recommended for we growing Vegetables from vegetables?
While we haven’t read this – two that look like they would be helpful are: Grocery Store Garden by Michelle Marsh and Don’t Throw It, Grow It! by Deborah Peterson Best wishes for your scrap gardening!!
why would you throw squash or peppers in your own yard or why would it make good fertilizer?
Pineapple is Questionable most plantations use first and second-gen pineapples after that good luck.
Need help with my 6 mo old cherry ? blossom tree the leaves are still intact but they are folded over and hanging. I think at 1st it was overwatered
. Then the freezing temps started. My son started this tree from a seed . Anyone! Please offer me some advice!!
Need help with my Lemon tree anyone please. The foliage is good but I have no fruit. What am I doing wrong?
Did you grow from a lemon seed? Will probably take 10 years to get fruit. You need to plant a grafted tree….one with rootstock!
Can take up to 15 years for the healthy tree to produce a lemon ?
I too have a problem with my lemon tree. I do have one singular lemon on it and am very keen on it. Meyers Lemon going into her second year with me as well as my Key Lime. Mine is growing in a container.
Sorry I meant Susan
No worries Agnes! Thank you for your comment – if you were referring to our Susan, our web content editor, she does a great job!
Is there someone I can ask a question via email?
I’ve just found this site ,it’s great Sandy ,thankyou
You need to make this page, and others like it, printable. It would be a great help.?
Hi Sandy, you can print any web page from any browser, and you can control which pages come out. What browser are you using? Just go to the top menu bar and hit print, then preferences.
You do not have to suspend avacado seed over water . I have much better luck just fixing a pot of soil, water it good and push the bottom or side of the seed about half way down in the soil, leaving about half above the soil. Keep the soil moist. After a month or two, it will split open and it will grow a plant up through the split. Oh, also before planting, I take a sharp knife and whack the seed, while in my hand, a few times just to make the skin outer layer where water can get in. I enjoy seeing them grow. They will need bright light of sunny window if grown inside.